
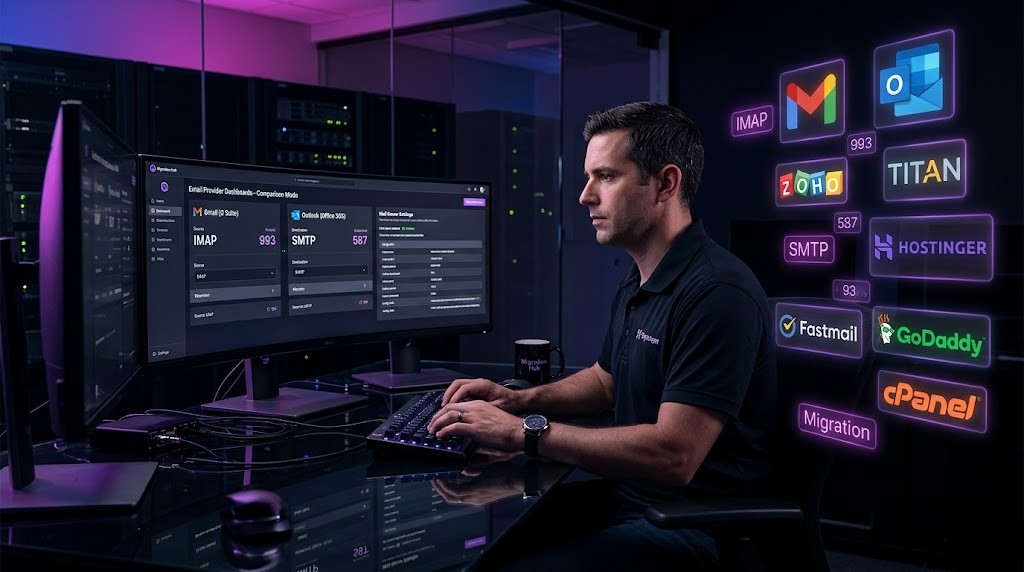
Getting your email working correctly across all your devices is not just about entering a username and password. It requires the right IMAP server settings, the right ports, the right DNS records on your domain, and — for security — the right authentication method.
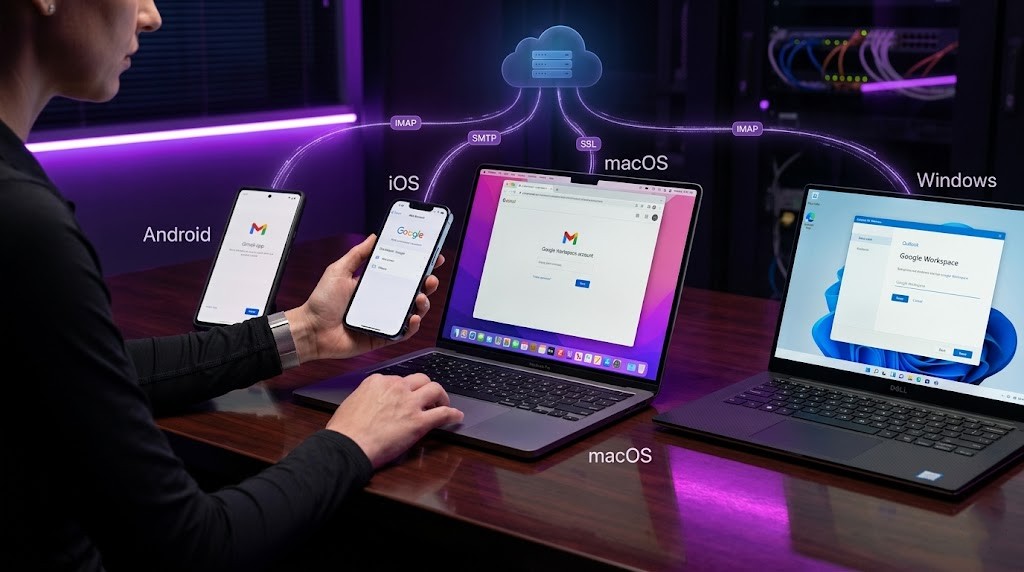
This guide covers every major email provider used by small businesses and professionals. For each provider you will find: the exact IMAP/SMTP settings, the DNS records you need to set up for your domain, and step-by-step setup instructions for Android, iOS, Mac (Apple Mail), and Windows (Outlook and Windows Mail).
Quick Answer: IMAP lets you access the same emails on all your devices simultaneously. DNS records (MX, SPF, DKIM, DMARC) control how email flows to and from your domain. You need both configured correctly for professional, reliable email.
What Are IMAP, SMTP, and DNS Settings -- and Why Do All Three Matter?

Before setting up email on any device, it helps to understand what each setting does:
- IMAP (Incoming Mail): Connects your device to the mail server to read emails. Port 993 with SSL is the universal standard.
- SMTP (Outgoing Mail): Sends emails from your device through your provider’s mail server. Port 587 (STARTTLS) is the modern standard.
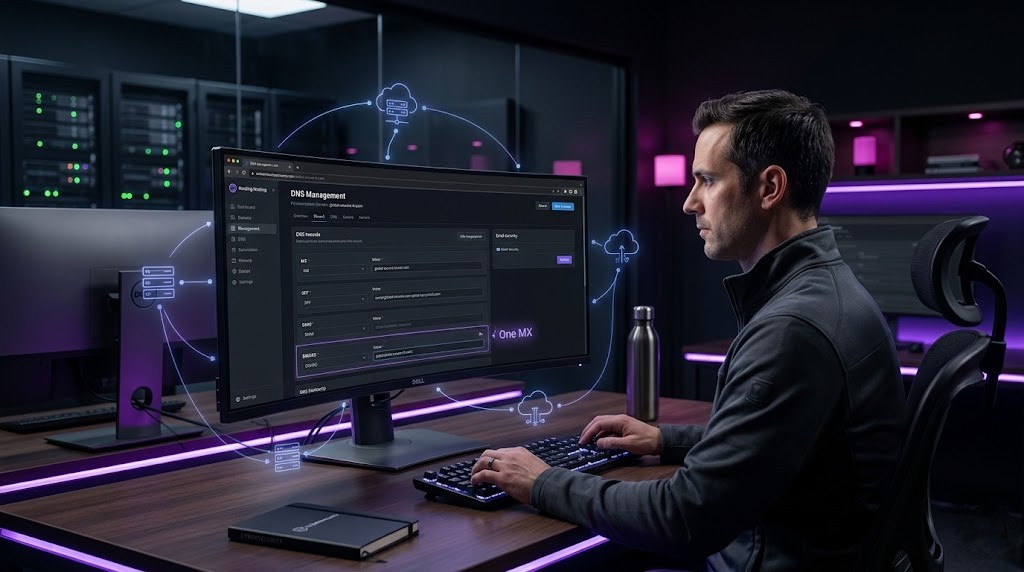
- MX Record (DNS): Tells the world which mail server receives email for your domain. Without this, no one can email you.
- SPF Record (DNS): Lists the servers authorised to send email on your behalf. Without this, your emails may be rejected as spam.
- DKIM Record (DNS): Adds a digital signature to outgoing email to prove it was not tampered with.
- DMARC Record (DNS): Enforces SPF and DKIM and tells receiving servers what to do when a check fails.
Your IMAP/SMTP settings affect device access. Your DNS records affect whether emails arrive and are trusted. You need both working correctly.
Which Email Ports and Encryption Types Should You Use?
| Protocol | Port | Encryption | Use Case | Recommended? |
|---|---|---|---|---|
| IMAP | 993 | SSL/TLS | Receive email (sync across devices) | Yes – use this |
| IMAP | 143 | STARTTLS | Receive email (older method) | Only if 993 fails |
| POP3 | 995 | SSL/TLS | Download email (removes from server) | No – use IMAP instead |
| POP3 | 110 | None | Download email (no encryption) | Never |
| SMTP | 587 | STARTTLS | Send email (modern standard) | Yes – use this |
| SMTP | 465 | SSL/TLS | Send email (older SSL method) | Acceptable |
| SMTP | 25 | None | Server-to-server relay (not for clients) | Never for clients |
Best Practice: Use IMAP port 993 (SSL/TLS) for incoming and SMTP port 587 (STARTTLS) for outgoing on every provider and every device. Never use port 25 in an email client — it is for server-to-server communication only.
What Are the IMAP and SMTP Server Settings for Every Major Email Provider?
| Provider | IMAP Server | IMAP Port | SMTP Server | SMTP Port | SSL |
|---|---|---|---|---|---|
| Google Workspace / Gmail | imap.gmail.com | 993 | smtp.gmail.com | 587 / 465 | Yes |
| Microsoft 365 / Outlook | outlook.office365.com | 993 | smtp.office365.com | 587 | Yes |
| Zoho Mail | imap.zoho.com | 993 | smtp.zoho.com | 587 / 465 | Yes |
| Titan Email | imap.titan.email | 993 | smtp.titan.email | 587 / 465 | Yes |
| Fastmail | imap.fastmail.com | 993 | smtp.fastmail.com | 587 / 465 | Yes |
| Yahoo Mail | imap.mail.yahoo.com | 993 | smtp.mail.yahoo.com | 587 / 465 | Yes |
| cPanel / Shared Hosting | mail.yourdomain.com | 993 | mail.yourdomain.com | 587 / 465 | Yes |
| Namecheap Private Email | mail.privateemail.com | 993 | mail.privateemail.com | 587 / 465 | Yes |
| Hostinger Email | imap.hostinger.com | 993 | smtp.hostinger.com | 587 / 465 | Yes |
| GoDaddy Workspace Email | imap.secureserver.net | 993 | smtpout.secureserver.net | 587 / 465 | Yes |
| ProtonMail (Bridge) | 127.0.0.1 (via Bridge app) | 1143 | 127.0.0.1 (via Bridge app) | 1025 | Bridge |
| iCloud Mail | imap.mail.me.com | 993 | smtp.mail.me.com | 587 | Yes |
| Amazon SES (SMTP relay) | email-smtp.[region].amazonaws.com | 587 | email-smtp.[region].amazonaws.com | 587 | Yes |
| Mailgun (SMTP relay) | N/A (sending only) | N/A | smtp.mailgun.org | 587 / 465 | Yes |
| SendGrid (SMTP relay) | N/A (sending only) | N/A | smtp.sendgrid.net | 587 / 465 | Yes |
Note: For cPanel and shared hosting providers, replace ‘mail.yourdomain.com’ with your actual domain name. The server hostname is always your own domain — not the hosting company’s domain.

What DNS Records Do You Need for Each Email Provider?
| Provider | MX Record | SPF include: | DKIM Selector Hint | DMARC Required? |
|---|---|---|---|---|
| Google Workspace | ASPMX.L.GOOGLE.COM (pri 1) | _spf.google.com | google._domainkey | Yes (p=none min) |
| Microsoft 365 | yourdomain.mail.protection.outlook.com | spf.protection.outlook.com | selector1/_domainkey | Yes (p=none min) |
| Zoho Mail | mx.zoho.com (pri 10) | zoho.com | zoho._domainkey | Recommended |
| Titan Email | mx1.titan.email (pri 10) | titan.email | auto-generated | Recommended |
| Fastmail | in1-smtp.messagingengine.com | spf.messagingengine.com | fm1._domainkey | Recommended |
| cPanel Hosting | mail.yourdomain.com | your hosting server IP | default._domainkey | Recommended |
| Hostinger | mx1.hostinger.com | spf.hostinger.com | hmail._domainkey | Recommended |
| GoDaddy | smtp.secureserver.net | secureserver.net | default._domainkey | Recommended |
Warning: Never have two MX records pointing to different providers at the same time. This splits incoming email between two servers and causes random delivery failures. Delete old MX records before adding new ones.
How Do You Set Up Google Workspace / Gmail on All Devices?
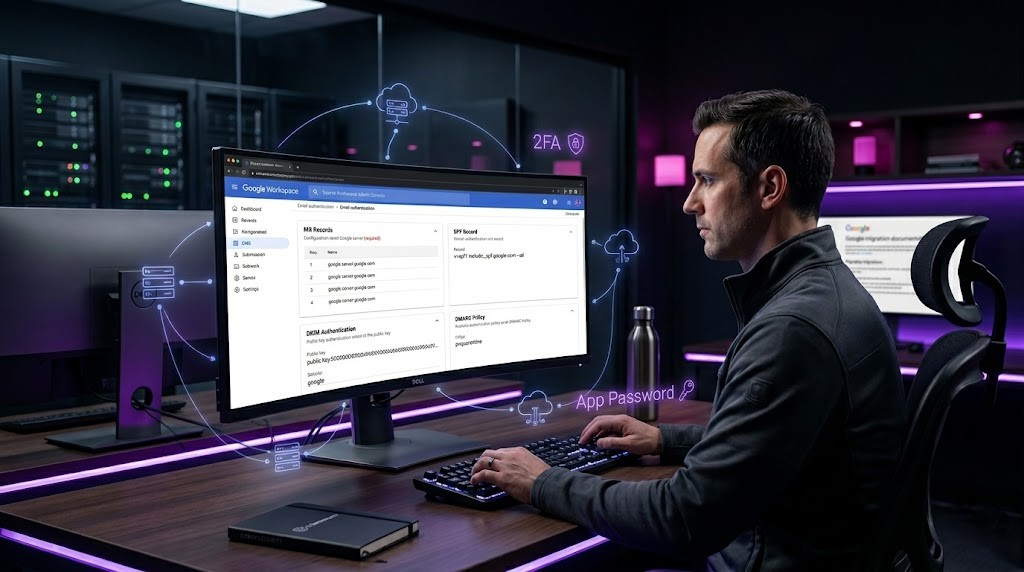
What DNS Records Does Google Workspace / Gmail Require?
| Setting | DNS Value |
|---|---|
| MX Record (pri 1) | ASPMX.L.GOOGLE.COM |
| MX Record (pri 5) | ALT1.ASPMX.L.GOOGLE.COM |
| MX Record (pri 5) | ALT2.ASPMX.L.GOOGLE.COM |
| MX Record (pri 10) | ALT3.ASPMX.L.GOOGLE.COM |
| MX Record (pri 10) | ALT4.ASPMX.L.GOOGLE.COM |
| SPF TXT Record | v=spf1 include:_spf.google.com ~all |
| DKIM | Generated in Admin Console > Apps > Gmail > Authenticate Email |
| DMARC | v=DMARC1; p=none; rua=mailto:dmarc@yourdomain.com |
Note: If you have 2-Step Verification enabled on your Google account, you MUST generate an App Password at myaccount.google.com/apppasswords and use that instead of your regular password.
What Are the IMAP and SMTP Settings for Google Workspace / Gmail?
| Setting | Value |
|---|---|
| Account Type | IMAP |
| Incoming Server | imap.gmail.com |
| Incoming Port | 993 |
| Incoming SSL | SSL/TLS (required) |
| Outgoing Server | smtp.gmail.com |
| Outgoing Port | 587 (STARTTLS) or 465 (SSL) |
| Outgoing SSL | STARTTLS or SSL/TLS |
| Username | your full Gmail address (e.g. you@gmail.com) |
| Password | App Password (if 2FA enabled) or Google account password |
Android Setup (Gmail App / Samsung Email)
Android Setup (Gmail App / Samsung Email)
Android (Gmail App / Samsung Email) — Google Workspace / Gmail
- Open Settings on your Android device.
- Tap Accounts & Backup (or Accounts on some devices) > Add Account.
- Select Other (or IMAP / Email) from the account type list.
- Enter your full email address and tap Next.
- Select IMAP when prompted to choose the account type.
- Incoming mail server: Enter imap.gmail.com | Port: 993
- Set Security Type to SSL/TLS. Enter your username and password. Tap Next.
- Outgoing mail server (SMTP): Enter smtp.gmail.com | Port: 587 (STARTTLS) or 465 (SSL)
- Set Security Type to STARTTLS or SSL/TLS. Require Sign-In: Yes. Tap Next.
- Choose sync frequency and notification preferences. Tap Done.
iOS / iPadOS iOS & iPadOS Setup (Apple Mail)
iOS / iPadOS (Apple Mail) — Google Workspace / Gmail
- Open Settings on your iPhone or iPad.
- Scroll down and tap Mail > Accounts > Add Account.
- Tap Other at the bottom of the provider list.
- Tap Add Mail Account. Enter your Name, Email Address, Password, and Description.
- Tap Next. iOS will attempt auto-configuration. If it fails, select IMAP.
- Incoming Mail Server: Host Name: imap.gmail.com | Port: 993
- Username: your full email address. Password: your email password. Tap Next.
- Outgoing Mail Server (SMTP): Host Name: smtp.gmail.com | Port: 587 (STARTTLS) or 465 (SSL)
- Username and Password: same as incoming. Tap Next, then Save.
- To verify SSL: go to Settings > Mail > Accounts > [Your Account] > Account > Advanced. Confirm Use SSL is ON for both incoming and outgoing.
macOS macOS Setup (Apple Mail)
macOS (Apple Mail) — Google Workspace / Gmail
- Open the Mail app on your Mac. Go to Mail > Add Account (or File > Add Account).
- Select Other Mail Account and click Continue.
- Enter your full name, email address, and password. Click Sign In.
- If auto-configuration fails, manually enter the account details.
- Incoming Mail Server: imap.gmail.com | Port: 993
- Account Type: IMAP. Username: full email address. Click Next.
- Outgoing Mail Server (SMTP): smtp.gmail.com | Port: 587 (STARTTLS) or 465 (SSL)
- Username and Password: same credentials. Click Next, then Done.
- To verify SSL: in Mail go to Mail > Settings > Accounts > [Account] > Server Settings. Confirm Use TLS/SSL is checked for both incoming and outgoing servers.
Windows Windows Setup -- Outlook Desktop
Windows — Outlook Desktop (Microsoft 365 / Outlook 2021/2024) — Google Workspace / Gmail
- Open Outlook. Click File > Add Account.
- Enter your email address. Click Advanced Options > Let me set up my account manually. Click Connect.
- Select IMAP from the account type list.
- Incoming (IMAP) server: imap.gmail.com | Port: 993 | Encryption: SSL/TLS
- Outgoing (SMTP) server: smtp.gmail.com | Port: 587 (STARTTLS) or 465 (SSL) | Encryption: STARTTLS
- Click Next. Enter your password and click Connect.
- If prompted for authentication, enter your full email address as the username.
- Click Done. Outlook will test the connection and complete the account setup.
Windows Setup -- Windows Mail App (Built-In)
Windows — Windows Mail App (built-in) — Google Workspace / Gmail
- Open the Mail app on Windows. Click the Settings gear icon.
- Click Manage Accounts > Add Account.
- Select Advanced Setup at the bottom of the provider list.
- Select Internet Email.
- Fill in Account Name (display name), Your Name, and Email Address.
- Incoming email server: imap.gmail.com | Port: 993
- Account type: IMAP4. Username: full email. Password: your password.
- Outgoing (SMTP) server: smtp.gmail.com | Port: 587 (STARTTLS) or 465 (SSL)
- Check: Outgoing server requires authentication. Use same username and password for sending. Require SSL for incoming. Require SSL for outgoing.
- Click Sign In. The account will be verified and added.
How Do You Set Up Microsoft 365 / Outlook.com on All Devices?
What DNS Records Does Microsoft 365 / Outlook.com Require?
Add the following DNS records to your domain registrar or DNS provider before configuring email on any device:
| Setting | DNS Value |
|---|---|
| MX Record | yourdomain.mail.protection.outlook.com (priority 0) |
| SPF TXT Record | v=spf1 include:spf.protection.outlook.com ~all |
| DKIM | Enable in Microsoft Defender > Email Authentication > DKIM |
| Autodiscover | CNAME: autodiscover.yourdomain.com → autodiscover.outlook.com |
| DMARC | v=DMARC1; p=none; rua=mailto:dmarc@yourdomain.com |
What Are the IMAP and SMTP Settings for Microsoft 365 / Outlook.com?
| Setting | Value |
|---|---|
| Account Type | IMAP (or use Exchange/Microsoft 365 account type) |
| Incoming Server | outlook.office365.com |
| Incoming Port | 993 |
| Incoming SSL | SSL/TLS (required) |
| Outgoing Server | smtp.office365.com |
| Outgoing Port | 587 |
| Outgoing SSL | STARTTLS (required) |
| Username | your full Microsoft 365 email address |
| Password | Microsoft account password or App Password if MFA is enabled |
Android Android Setup (Gmail App / Samsung Email)
Android (Gmail App / Samsung Email) — Zoho Mail
- Open Settings on your Android device.
- Tap Accounts & Backup (or Accounts on some devices) > Add Account.
- Select Other (or IMAP / Email) from the account type list.
- Enter your full email address and tap Next.
- Select IMAP when prompted to choose the account type.
- Incoming mail server: Enter imap.zoho.com | Port: 993
- Set Security Type to SSL/TLS. Enter your username and password. Tap Next.
- Outgoing mail server (SMTP): Enter smtp.zoho.com | Port: 587 (STARTTLS) or 465 (SSL)
- Set Security Type to STARTTLS or SSL/TLS. Require Sign-In: Yes. Tap Next.
- Choose sync frequency and notification preferences. Tap Done.
iOS / iPadOS iOS & iPadOS Setup (Apple Mail)
iOS / iPadOS (Apple Mail) — Zoho Mail
- Open Settings on your iPhone or iPad.
- Scroll down and tap Mail > Accounts > Add Account.
- Tap Other at the bottom of the provider list.
- Tap Add Mail Account. Enter your Name, Email Address, Password, and Description.
- Tap Next. iOS will attempt auto-configuration. If it fails, select IMAP.
- Incoming Mail Server: Host Name: imap.zoho.com | Port: 993
- Username: your full email address. Password: your email password. Tap Next.
- Outgoing Mail Server (SMTP): Host Name: smtp.zoho.com | Port: 587 (STARTTLS) or 465 (SSL)
- Username and Password: same as incoming. Tap Next, then Save.
- To verify SSL: go to Settings > Mail > Accounts > [Your Account] > Account > Advanced. Confirm Use SSL is ON for both incoming and outgoing.
macOS macOS Setup (Apple Mail)
macOS (Apple Mail) — Zoho Mail
- Open the Mail app on your Mac. Go to Mail > Add Account (or File > Add Account).
- Select Other Mail Account and click Continue.
- Enter your full name, email address, and password. Click Sign In.
- If auto-configuration fails, manually enter the account details.
- Incoming Mail Server: imap.zoho.com | Port: 993
- Account Type: IMAP. Username: full email address. Click Next.
- Outgoing Mail Server (SMTP): smtp.zoho.com | Port: 587 (STARTTLS) or 465 (SSL)
- Username and Password: same credentials. Click Next, then Done.
- To verify SSL: in Mail go to Mail > Settings > Accounts > [Account] > Server Settings. Confirm Use TLS/SSL is checked for both incoming and outgoing servers.
Windows Setup -- Outlook Desktop
Windows — Outlook Desktop (Microsoft 365 / Outlook 2021/2024) — Zoho Mail
- Open Outlook. Click File > Add Account.
- Enter your email address. Click Advanced Options > Let me set up my account manually. Click Connect.
- Select IMAP from the account type list.
- Incoming (IMAP) server: imap.zoho.com | Port: 993 | Encryption: SSL/TLS
- Outgoing (SMTP) server: smtp.zoho.com | Port: 587 (STARTTLS) or 465 (SSL) | Encryption: STARTTLS
- Click Next. Enter your password and click Connect.
- If prompted for authentication, enter your full email address as the username.
- Click Done. Outlook will test the connection and complete the account setup.
Windows Setup -- Windows Mail App (Built-In)
Windows — Windows Mail App (built-in) — Zoho Mail
- Open the Mail app on Windows. Click the Settings gear icon.
- Click Manage Accounts > Add Account.
- Select Advanced Setup at the bottom of the provider list.
- Select Internet Email.
- Fill in Account Name (display name), Your Name, and Email Address.
- Incoming email server: imap.zoho.com | Port: 993
- Account type: IMAP4. Username: full email. Password: your password.
- Outgoing (SMTP) server: smtp.zoho.com | Port: 587 (STARTTLS) or 465 (SSL)
- Check: Outgoing server requires authentication. Use same username and password for sending. Require SSL for incoming. Require SSL for outgoing.
- Click Sign In. The account will be verified and added.
How Do You Set Up Titan Email on All Devices?

What DNS Records Does Titan Email Require?
| Setting | DNS Value |
|---|---|
| MX Record (pri 10) | mx1.titan.email |
| MX Record (pri 20) | mx2.titan.email |
| SPF TXT Record | v=spf1 include:titan.email ~all |
| DKIM | Auto-generated — check your Titan admin panel for the TXT record |
| DMARC | v=DMARC1; p=none; rua=mailto:dmarc@yourdomain.com |
What Are the IMAP and SMTP Settings for Titan Email?
| Setting | Value |
|---|---|
| Account Type | IMAP |
| Incoming Server | imap.titan.email |
| Incoming Port | 993 |
| Incoming SSL | SSL/TLS (required) |
| Outgoing Server | smtp.titan.email |
| Outgoing Port | 587 (STARTTLS) or 465 (SSL) |
| Outgoing SSL | STARTTLS or SSL/TLS |
| Username | your full Titan email address |
| Password | your Titan account password |
Android Android Setup (Gmail App / Samsung Email)
Android (Gmail App / Samsung Email) — Titan Email
- Open Settings on your Android device.
- Tap Accounts & Backup (or Accounts on some devices) > Add Account.
- Select Other (or IMAP / Email) from the account type list.
- Enter your full email address and tap Next.
- Select IMAP when prompted to choose the account type.
- Incoming mail server: Enter imap.titan.email | Port: 993
- Set Security Type to SSL/TLS. Enter your username and password. Tap Next.
- Outgoing mail server (SMTP): Enter smtp.titan.email | Port: 587 (STARTTLS) or 465 (SSL)
- Set Security Type to STARTTLS or SSL/TLS. Require Sign-In: Yes. Tap Next.
- Choose sync frequency and notification preferences. Tap Done.
iOS / iPadOS iOS & iPadOS Setup (Apple Mail)
iOS / iPadOS (Apple Mail) — Titan Email
- Open Settings on your iPhone or iPad.
- Scroll down and tap Mail > Accounts > Add Account.
- Tap Other at the bottom of the provider list.
- Tap Add Mail Account. Enter your Name, Email Address, Password, and Description.
- Tap Next. iOS will attempt auto-configuration. If it fails, select IMAP.
- Incoming Mail Server: Host Name: imap.titan.email | Port: 993
- Username: your full email address. Password: your email password. Tap Next.
- Outgoing Mail Server (SMTP): Host Name: smtp.titan.email | Port: 587 (STARTTLS) or 465 (SSL)
- Username and Password: same as incoming. Tap Next, then Save.
- To verify SSL: go to Settings > Mail > Accounts > [Your Account] > Account > Advanced. Confirm Use SSL is ON for both incoming and outgoing.
macOS Setup (Apple Mail)
macOS (Apple Mail) — Titan Email
- Open the Mail app on your Mac. Go to Mail > Add Account (or File > Add Account).
- Select Other Mail Account and click Continue.
- Enter your full name, email address, and password. Click Sign In.
- If auto-configuration fails, manually enter the account details.
- Incoming Mail Server: imap.titan.email | Port: 993
- Account Type: IMAP. Username: full email address. Click Next.
- Outgoing Mail Server (SMTP): smtp.titan.email | Port: 587 (STARTTLS) or 465 (SSL)
- Username and Password: same credentials. Click Next, then Done.
- To verify SSL: in Mail go to Mail > Settings > Accounts > [Account] > Server Settings. Confirm Use TLS/SSL is checked for both incoming and outgoing servers.
Windows Setup -- Outlook Desktop
Windows — Outlook Desktop (Microsoft 365 / Outlook 2021/2024) — Titan Email
- Open Outlook. Click File > Add Account.
- Enter your email address. Click Advanced Options > Let me set up my account manually. Click Connect.
- Select IMAP from the account type list.
- Incoming (IMAP) server: imap.titan.email | Port: 993 | Encryption: SSL/TLS
- Outgoing (SMTP) server: smtp.titan.email | Port: 587 (STARTTLS) or 465 (SSL) | Encryption: STARTTLS
- Click Next. Enter your password and click Connect.
- If prompted for authentication, enter your full email address as the username.
- Click Done. Outlook will test the connection and complete the account setup.
Windows Setup -- Windows Mail App (Built-In)
Windows — Windows Mail App (built-in) — Titan Email
- Open the Mail app on Windows. Click the Settings gear icon.
- Click Manage Accounts > Add Account.
- Select Advanced Setup at the bottom of the provider list.
- Select Internet Email.
- Fill in Account Name (display name), Your Name, and Email Address.
- Incoming email server: imap.titan.email | Port: 993
- Account type: IMAP4. Username: full email. Password: your password.
- Outgoing (SMTP) server: smtp.titan.email | Port: 587 (STARTTLS) or 465 (SSL)
- Check: Outgoing server requires authentication. Use same username and password for sending. Require SSL for incoming. Require SSL for outgoing.
- Click Sign In. The account will be verified and added.
How Do You Set Up Fastmail on All Devices?
What DNS Records Does Fastmail Require?
| Setting | DNS Value |
|---|---|
| MX Record (pri 10) | in1-smtp.messagingengine.com |
| MX Record (pri 20) | in2-smtp.messagingengine.com |
| SPF TXT Record | v=spf1 include:spf.messagingengine.com ~all |
| DKIM | fm1._domainkey, fm2._domainkey, fm3._domainkey — generated in Fastmail settings |
| DMARC | v=DMARC1; p=none; rua=mailto:dmarc@yourdomain.com |
What Are the IMAP and SMTP Settings for Fastmail?
| Setting | Value |
|---|---|
| Account Type | IMAP |
| Incoming Server | imap.fastmail.com |
| Incoming Port | 993 |
| Incoming SSL | SSL/TLS (required) |
| Outgoing Server | smtp.fastmail.com |
| Outgoing Port | 587 (STARTTLS) or 465 (SSL) |
| Outgoing SSL | STARTTLS or SSL/TLS |
| Username | your full Fastmail email address |
| Password | App Password generated at fastmail.com/settings (not your login password) |
Android Android Setup (Gmail App / Samsung Email)
Android (Gmail App / Samsung Email) — Fastmail
- Open Settings on your Android device.
- Tap Accounts & Backup (or Accounts on some devices) > Add Account.
- Select Other (or IMAP / Email) from the account type list.
- Enter your full email address and tap Next.
- Select IMAP when prompted to choose the account type.
- Incoming mail server: Enter imap.fastmail.com | Port: 993
- Set Security Type to SSL/TLS. Enter your username and password. Tap Next.
- Outgoing mail server (SMTP): Enter smtp.fastmail.com | Port: 587 (STARTTLS) or 465 (SSL)
- Set Security Type to STARTTLS or SSL/TLS. Require Sign-In: Yes. Tap Next.
- Choose sync frequency and notification preferences. Tap Done.
iOS / iPadOS iOS & iPadOS Setup (Apple Mail)
iOS / iPadOS (Apple Mail) — Fastmail
- Open Settings on your iPhone or iPad.
- Scroll down and tap Mail > Accounts > Add Account.
- Tap Other at the bottom of the provider list.
- Tap Add Mail Account. Enter your Name, Email Address, Password, and Description.
- Tap Next. iOS will attempt auto-configuration. If it fails, select IMAP.
- Incoming Mail Server: Host Name: imap.fastmail.com | Port: 993
- Username: your full email address. Password: your email password. Tap Next.
- Outgoing Mail Server (SMTP): Host Name: smtp.fastmail.com | Port: 587 (STARTTLS) or 465 (SSL)
- Username and Password: same as incoming. Tap Next, then Save.
- To verify SSL: go to Settings > Mail > Accounts > [Your Account] > Account > Advanced. Confirm Use SSL is ON for both incoming and outgoing.
macOS Setup (Apple Mail)
macOS (Apple Mail) — Fastmail
- Open the Mail app on your Mac. Go to Mail > Add Account (or File > Add Account).
- Select Other Mail Account and click Continue.
- Enter your full name, email address, and password. Click Sign In.
- If auto-configuration fails, manually enter the account details.
- Incoming Mail Server: imap.fastmail.com | Port: 993
- Account Type: IMAP. Username: full email address. Click Next.
- Outgoing Mail Server (SMTP): smtp.fastmail.com | Port: 587 (STARTTLS) or 465 (SSL)
- Username and Password: same credentials. Click Next, then Done.
- To verify SSL: in Mail go to Mail > Settings > Accounts > [Account] > Server Settings. Confirm Use TLS/SSL is checked for both incoming and outgoing servers.
Windows Setup -- Outlook Desktop
Windows — Outlook Desktop (Microsoft 365 / Outlook 2021/2024) — Fastmail
- Open Outlook. Click File > Add Account.
- Enter your email address. Click Advanced Options > Let me set up my account manually. Click Connect.
- Select IMAP from the account type list.
- Incoming (IMAP) server: imap.fastmail.com | Port: 993 | Encryption: SSL/TLS
- Outgoing (SMTP) server: smtp.fastmail.com | Port: 587 (STARTTLS) or 465 (SSL) | Encryption: STARTTLS
- Click Next. Enter your password and click Connect.
- If prompted for authentication, enter your full email address as the username.
- Click Done. Outlook will test the connection and complete the account setup.
Windows Setup -- Windows Mail App (Built-In)
Windows — Windows Mail App (built-in) — Fastmail
- Open the Mail app on Windows. Click the Settings gear icon.
- Click Manage Accounts > Add Account.
- Select Advanced Setup at the bottom of the provider list.
- Select Internet Email.
- Fill in Account Name (display name), Your Name, and Email Address.
- Incoming email server: imap.fastmail.com | Port: 993
- Account type: IMAP4. Username: full email. Password: your password.
- Outgoing (SMTP) server: smtp.fastmail.com | Port: 587 (STARTTLS) or 465 (SSL)
- Check: Outgoing server requires authentication. Use same username and password for sending. Require SSL for incoming. Require SSL for outgoing.
- Click Sign In. The account will be verified and added.
How Do You Set Up cPanel / Shared Hosting Email on All Devices?

What DNS Records Does cPanel / Shared Hosting Email Require?
| Setting | DNS Value |
|---|---|
| MX Record | mail.yourdomain.com (priority 0) — auto-set by cPanel if DNS is local |
| SPF TXT Record | v=spf1 a mx ip4:YOUR_SERVER_IP ~all |
| DKIM | Enable in cPanel > Email > Email Deliverability > Install Suggested Record |
| DMARC | v=DMARC1; p=none; rua=mailto:dmarc@yourdomain.com |
| SSL Certificate | Enable in cPanel > Email > Email Deliverability (requires valid SSL on server) |
What Are the IMAP and SMTP Settings for cPanel / Shared Hosting Email?
| Setting | Value |
|---|---|
| Account Type | IMAP |
| Incoming Server | mail.yourdomain.com (replace with your actual domain) |
| Incoming Port | 993 |
| Incoming SSL | SSL/TLS (required) |
| Outgoing Server | mail.yourdomain.com (same as incoming) |
| Outgoing Port | 587 (STARTTLS) or 465 (SSL) |
| Outgoing SSL | STARTTLS or SSL/TLS |
| Username | your full email address (you@yourdomain.com) |
| Password | cPanel email account password set in cPanel > Email Accounts |
Android Android Setup (Gmail App / Samsung Email)
Android (Gmail App / Samsung Email) — cPanel / Shared Hosting Email
- Open Settings on your Android device.
- Tap Accounts & Backup (or Accounts on some devices) > Add Account.
- Select Other (or IMAP / Email) from the account type list.
- Enter your full email address and tap Next.
- Select IMAP when prompted to choose the account type.
- Incoming mail server: Enter mail.yourdomain.com (replace with your actual domain) | Port: 993
- Set Security Type to SSL/TLS. Enter your username and password. Tap Next.
- Outgoing mail server (SMTP): Enter mail.yourdomain.com (same as incoming) | Port: 587 (STARTTLS) or 465 (SSL)
- Set Security Type to STARTTLS or SSL/TLS. Require Sign-In: Yes. Tap Next.
- Choose sync frequency and notification preferences. Tap Done.
iOS / iPadOS iOS & iPadOS Setup (Apple Mail)
iOS / iPadOS (Apple Mail) — cPanel / Shared Hosting Email
- Open Settings on your iPhone or iPad.
- Scroll down and tap Mail > Accounts > Add Account.
- Tap Other at the bottom of the provider list.
- Tap Add Mail Account. Enter your Name, Email Address, Password, and Description.
- Tap Next. iOS will attempt auto-configuration. If it fails, select IMAP.
- Incoming Mail Server: Host Name: mail.yourdomain.com (replace with your actual domain) | Port: 993
- Username: your full email address. Password: your email password. Tap Next.
- Outgoing Mail Server (SMTP): Host Name: mail.yourdomain.com (same as incoming) | Port: 587 (STARTTLS) or 465 (SSL)
- Username and Password: same as incoming. Tap Next, then Save.
- To verify SSL: go to Settings > Mail > Accounts > [Your Account] > Account > Advanced. Confirm Use SSL is ON for both incoming and outgoing.
macOS Setup (Apple Mail)
macOS (Apple Mail) — cPanel / Shared Hosting Email
- Open the Mail app on your Mac. Go to Mail > Add Account (or File > Add Account).
- Select Other Mail Account and click Continue.
- Enter your full name, email address, and password. Click Sign In.
- If auto-configuration fails, manually enter the account details.
- Incoming Mail Server: mail.yourdomain.com (replace with your actual domain) | Port: 993
- Account Type: IMAP. Username: full email address. Click Next.
- Outgoing Mail Server (SMTP): mail.yourdomain.com (same as incoming) | Port: 587 (STARTTLS) or 465 (SSL)
- Username and Password: same credentials. Click Next, then Done.
- To verify SSL: in Mail go to Mail > Settings > Accounts > [Account] > Server Settings. Confirm Use TLS/SSL is checked for both incoming and outgoing servers.
Windows Setup -- Outlook Desktop
Windows — Outlook Desktop (Microsoft 365 / Outlook 2021/2024) — cPanel / Shared Hosting Email
- Open Outlook. Click File > Add Account.
- Enter your email address. Click Advanced Options > Let me set up my account manually. Click Connect.
- Select IMAP from the account type list.
- Incoming (IMAP) server: mail.yourdomain.com (replace with your actual domain) | Port: 993 | Encryption: SSL/TLS
- Outgoing (SMTP) server: mail.yourdomain.com (same as incoming) | Port: 587 (STARTTLS) or 465 (SSL) | Encryption: STARTTLS
- Click Next. Enter your password and click Connect.
- If prompted for authentication, enter your full email address as the username.
- Click Done. Outlook will test the connection and complete the account setup.
Windows Setup -- Windows Mail App (Built-In)
Windows — Windows Mail App (built-in) — cPanel / Shared Hosting Email
- Open the Mail app on Windows. Click the Settings gear icon.
- Click Manage Accounts > Add Account.
- Select Advanced Setup at the bottom of the provider list.
- Select Internet Email.
- Fill in Account Name (display name), Your Name, and Email Address.
- Incoming email server: mail.yourdomain.com (replace with your actual domain) | Port: 993
- Account type: IMAP4. Username: full email. Password: your password.
- Outgoing (SMTP) server: mail.yourdomain.com (same as incoming) | Port: 587 (STARTTLS) or 465 (SSL)
- Check: Outgoing server requires authentication. Use same username and password for sending. Require SSL for incoming. Require SSL for outgoing.
- Click Sign In. The account will be verified and added.
How Do You Set Up Hostinger Business Email on All Devices?
What DNS Records Does Hostinger Business Email Require?
| Setting | DNS Value |
|---|---|
| MX Record (pri 10) | mx1.hostinger.com |
| MX Record (pri 20) | mx2.hostinger.com |
| SPF TXT Record | v=spf1 include:spf.hostinger.com ~all |
| DKIM | Auto-generated in hPanel > Emails > DNS Records |
| DMARC | v=DMARC1; p=none; rua=mailto:dmarc@yourdomain.com |
Note: Hostinger’s hPanel automatically configures DNS records when you create an email account on their platform. Verify records are active under Emails > Email Accounts > DNS Setup.
What Are the IMAP and SMTP Settings for Hostinger Business Email?
| Setting | Value |
|---|---|
| Account Type | IMAP |
| Incoming Server | imap.hostinger.com |
| Incoming Port | 993 |
| Incoming SSL | SSL/TLS (required) |
| Outgoing Server | smtp.hostinger.com |
| Outgoing Port | 587 (STARTTLS) or 465 (SSL) |
| Outgoing SSL | STARTTLS or SSL/TLS |
| Username | your full email address |
| Password | email account password set in hPanel |
Android Android Setup (Gmail App / Samsung Email)
Android (Gmail App / Samsung Email) — Hostinger Business Email
- Open Settings on your Android device.
- Tap Accounts & Backup (or Accounts on some devices) > Add Account.
- Select Other (or IMAP / Email) from the account type list.
- Enter your full email address and tap Next.
- Select IMAP when prompted to choose the account type.
- Incoming mail server: Enter imap.hostinger.com | Port: 993
- Set Security Type to SSL/TLS. Enter your username and password. Tap Next.
- Outgoing mail server (SMTP): Enter smtp.hostinger.com | Port: 587 (STARTTLS) or 465 (SSL)
- Set Security Type to STARTTLS or SSL/TLS. Require Sign-In: Yes. Tap Next.
- Choose sync frequency and notification preferences. Tap Done.
iOS / iPadOS iOS & iPadOS Setup (Apple Mail)
iOS / iPadOS (Apple Mail) — Hostinger Business Email
- Open Settings on your iPhone or iPad.
- Scroll down and tap Mail > Accounts > Add Account.
- Tap Other at the bottom of the provider list.
- Tap Add Mail Account. Enter your Name, Email Address, Password, and Description.
- Tap Next. iOS will attempt auto-configuration. If it fails, select IMAP.
- Incoming Mail Server: Host Name: imap.hostinger.com | Port: 993
- Username: your full email address. Password: your email password. Tap Next.
- Outgoing Mail Server (SMTP): Host Name: smtp.hostinger.com | Port: 587 (STARTTLS) or 465 (SSL)
- Username and Password: same as incoming. Tap Next, then Save.
- To verify SSL: go to Settings > Mail > Accounts > [Your Account] > Account > Advanced. Confirm Use SSL is ON for both incoming and outgoing.
macOS Setup (Apple Mail)
macOS (Apple Mail) — Hostinger Business Email
- Open the Mail app on your Mac. Go to Mail > Add Account (or File > Add Account).
- Select Other Mail Account and click Continue.
- Enter your full name, email address, and password. Click Sign In.
- If auto-configuration fails, manually enter the account details.
- Incoming Mail Server: imap.hostinger.com | Port: 993
- Account Type: IMAP. Username: full email address. Click Next.
- Outgoing Mail Server (SMTP): smtp.hostinger.com | Port: 587 (STARTTLS) or 465 (SSL)
- Username and Password: same credentials. Click Next, then Done.
- To verify SSL: in Mail go to Mail > Settings > Accounts > [Account] > Server Settings. Confirm Use TLS/SSL is checked for both incoming and outgoing servers.
Windows Setup -- Outlook Desktop
Windows — Outlook Desktop (Microsoft 365 / Outlook 2021/2024) — Hostinger Business Email
- Open Outlook. Click File > Add Account.
- Enter your email address. Click Advanced Options > Let me set up my account manually. Click Connect.
- Select IMAP from the account type list.
- Incoming (IMAP) server: imap.hostinger.com | Port: 993 | Encryption: SSL/TLS
- Outgoing (SMTP) server: smtp.hostinger.com | Port: 587 (STARTTLS) or 465 (SSL) | Encryption: STARTTLS
- Click Next. Enter your password and click Connect.
- If prompted for authentication, enter your full email address as the username.
- Click Done. Outlook will test the connection and complete the account setup.
Windows Setup -- Windows Mail App (Built-In)
Windows — Windows Mail App (built-in) — Hostinger Business Email
- Open the Mail app on Windows. Click the Settings gear icon.
- Click Manage Accounts > Add Account.
- Select Advanced Setup at the bottom of the provider list.
- Select Internet Email.
- Fill in Account Name (display name), Your Name, and Email Address.
- Incoming email server: imap.hostinger.com | Port: 993
- Account type: IMAP4. Username: full email. Password: your password.
- Outgoing (SMTP) server: smtp.hostinger.com | Port: 587 (STARTTLS) or 465 (SSL)
- Check: Outgoing server requires authentication. Use same username and password for sending. Require SSL for incoming. Require SSL for outgoing.
- Click Sign In. The account will be verified and added.
How Do You Set Up GoDaddy Workspace / Microsoft 365 (via GoDaddy) on All Devices?

What DNS Records Does GoDaddy Workspace / Microsoft 365 (via GoDaddy) Require?
| Setting | DNS Value |
|---|---|
| MX Record | smtp.secureserver.net (priority 0) — auto-managed by GoDaddy |
| SPF TXT Record | v=spf1 include:secureserver.net ~all |
| DKIM | Configured automatically by GoDaddy for Workspace Email accounts |
| DMARC | v=DMARC1; p=none; rua=mailto:dmarc@yourdomain.com |
What Are the IMAP and SMTP Settings for GoDaddy Workspace / Microsoft 365 (via GoDaddy)?
| Setting | Value |
|---|---|
| Account Type | IMAP |
| Incoming Server | imap.secureserver.net |
| Incoming Port | 993 |
| Incoming SSL | SSL/TLS (required) |
| Outgoing Server | smtpout.secureserver.net |
| Outgoing Port | 587 or 465 |
| Outgoing SSL | SSL/TLS |
| Username | your full GoDaddy email address |
| Password | GoDaddy email account password |
Android Android Setup (Gmail App / Samsung Email)
Android (Gmail App / Samsung Email) — GoDaddy Workspace / Microsoft 365 (via GoDaddy)
- Open Settings on your Android device.
- Tap Accounts & Backup (or Accounts on some devices) > Add Account.
- Select Other (or IMAP / Email) from the account type list.
- Enter your full email address and tap Next.
- Select IMAP when prompted to choose the account type.
- Incoming mail server: Enter imap.secureserver.net | Port: 993
- Set Security Type to SSL/TLS. Enter your username and password. Tap Next.
- Outgoing mail server (SMTP): Enter smtpout.secureserver.net | Port: 587 or 465
- Set Security Type to STARTTLS or SSL/TLS. Require Sign-In: Yes. Tap Next.
- Choose sync frequency and notification preferences. Tap Done.
iOS / iPadOS iOS & iPadOS Setup (Apple Mail)
iOS / iPadOS (Apple Mail) — GoDaddy Workspace / Microsoft 365 (via GoDaddy)
- Open Settings on your iPhone or iPad.
- Scroll down and tap Mail > Accounts > Add Account.
- Tap Other at the bottom of the provider list.
- Tap Add Mail Account. Enter your Name, Email Address, Password, and Description.
- Tap Next. iOS will attempt auto-configuration. If it fails, select IMAP.
- Incoming Mail Server: Host Name: imap.secureserver.net | Port: 993
- Username: your full email address. Password: your email password. Tap Next.
- Outgoing Mail Server (SMTP): Host Name: smtpout.secureserver.net | Port: 587 or 465
- Username and Password: same as incoming. Tap Next, then Save.
- To verify SSL: go to Settings > Mail > Accounts > [Your Account] > Account > Advanced. Confirm Use SSL is ON for both incoming and outgoing.
macOS Setup (Apple Mail)
Windows — Windows Mail App (built-in) — GoDaddy Workspace / Microsoft 365 (via GoDaddy)
- Open the Mail app on Windows. Click the Settings gear icon.
- Click Manage Accounts > Add Account.
- Select Advanced Setup at the bottom of the provider list.
- Select Internet Email.
- Fill in Account Name (display name), Your Name, and Email Address.
- Incoming email server: imap.secureserver.net | Port: 993
- Account type: IMAP4. Username: full email. Password: your password.
- Outgoing (SMTP) server: smtpout.secureserver.net | Port: 587 or 465
- Check: Outgoing server requires authentication. Use same username and password for sending. Require SSL for incoming. Require SSL for outgoing.
- Click Sign In. The account will be verified and added.
Windows Setup -- Outlook Desktop
Windows — Outlook Desktop (Microsoft 365 / Outlook 2021/2024) — GoDaddy Workspace / Microsoft 365 (via GoDaddy)
- Open Outlook. Click File > Add Account.
- Enter your email address. Click Advanced Options > Let me set up my account manually. Click Connect.
- Select IMAP from the account type list.
- Incoming (IMAP) server: imap.secureserver.net | Port: 993 | Encryption: SSL/TLS
- Outgoing (SMTP) server: smtpout.secureserver.net | Port: 587 or 465 | Encryption: STARTTLS
- Click Next. Enter your password and click Connect.
- If prompted for authentication, enter your full email address as the username.
- Click Done. Outlook will test the connection and complete the account setup.
Windows Setup -- Windows Mail App (Built-In)
Windows — Windows Mail App (built-in) — Hostinger Business Email
- Open the Mail app on Windows. Click the Settings gear icon.
- Click Manage Accounts > Add Account.
- Select Advanced Setup at the bottom of the provider list.
- Select Internet Email.
- Fill in Account Name (display name), Your Name, and Email Address.
- Incoming email server: imap.hostinger.com | Port: 993
- Account type: IMAP4. Username: full email. Password: your password.
- Outgoing (SMTP) server: smtp.hostinger.com | Port: 587 (STARTTLS) or 465 (SSL)
- Check: Outgoing server requires authentication. Use same username and password for sending. Require SSL for incoming. Require SSL for outgoing.
- Click Sign In. The account will be verified and added.
How Do You Set Up Any Email Provider in Mozilla Thunderbird (Windows and Mac)?

Thunderbird is a free, open-source email client that works on both Windows and macOS and supports every IMAP email provider. It includes an auto-configuration system that detects settings automatically for most providers.
- Download and install Mozilla Thunderbird from thunderbird.net.
- Open Thunderbird. The Account Setup wizard opens automatically.
- Enter your name, email address, and password. Click Continue.
- Thunderbird attempts auto-configuration. For major providers (Google, Microsoft, Zoho, Fastmail) it usually succeeds. Click Done if settings are found.
- If auto-configuration fails, click Configure Manually. Enter the IMAP and SMTP settings from the master table above.
- Set IMAP host, port 993, SSL/TLS. Set SMTP host, port 587, STARTTLS.
- Click Re-test to verify the connection. Click Done.
Quick Setup Reference Card -- The Settings You Need at a Glance
GOOGLE WORKSPACE / GMAIL
IMAP: imap.gmail.com : 993 (SSL)
SMTP: smtp.gmail.com : 587 (STARTTLS)
MX: ASPMX.L.GOOGLE.COM (pri 1)
SPF: v=spf1 include:_spf.google.com ~all
MICROSOFT 365 / OUTLOOK
IMAP: outlook.office365.com : 993 (SSL)
SMTP: smtp.office365.com : 587 (STARTTLS)
MX: yourdomain.mail.protection.outlook.com
SPF: include:spf.protection.outlook.com
ZOHO MAIL
IMAP: imap.zoho.com : 993 (SSL)
SMTP: smtp.zoho.com : 587 (STARTTLS)
MX: mx.zoho.com (pri 10)
SPF: v=spf1 include:zoho.com ~all
TITAN EMAIL
IMAP: imap.titan.email : 993 (SSL)
SMTP: smtp.titan.email : 587 (STARTTLS)
MX: mx1.titan.email (pri 10)
SPF: v=spf1 include:titan.email ~all
FASTMAIL
IMAP: imap.fastmail.com : 993 (SSL)
SMTP: smtp.fastmail.com : 587 (STARTTLS)
MX: in1-smtp.messagingengine.com
SPF: v=spf1 include:spf.messagingengine.com ~all
CPANEL / SHARED HOSTING
IMAP: mail.yourdomain.com : 993 (SSL)
SMTP: mail.yourdomain.com : 587 (STARTTLS)
MX: mail.yourdomain.com (pri 0)
SPF: v=spf1 a mx ip4:YOUR_SERVER_IP ~all
HOSTINGER
IMAP: imap.hostinger.com : 993 (SSL)
SMTP: smtp.hostinger.com : 587 (STARTTLS)
MX: mx1.hostinger.com (pri 10)
SPF: v=spf1 include:spf.hostinger.com ~all
GODADDY
IMAP: imap.secureserver.net : 993
SMTP: smtpout.secureserver.net : 587
MX: smtp.secureserver.net (pri 0)
SPF: v=spf1 include:secureserver.net ~all
Need Help Configuring Email on Your Devices?
We configure business email across all platforms — Android, iOS, Mac, and Windows — for teams using Google Workspace, Microsoft 365, Zoho, Titan, Fastmail, cPanel, and more. We also handle DNS setup (MX, SPF, DKIM, DMARC) so your emails arrive every time.
Frequently Asked Questions (FAQs)
What is the difference between IMAP and POP3 for email setup?
IMAP (Internet Message Access Protocol) keeps your emails on the server and syncs them across all your devices — phone, tablet, laptop, and desktop all show the same inbox. POP3 downloads emails to a single device and usually deletes them from the server. Always use IMAP for business email on multiple devices. POP3 is obsolete for modern use cases.
Why does my email client keep asking for my password?
This usually means the authentication failed during setup. The three most common causes are: (1) You used your account login password instead of an App Password when 2FA is enabled — generate an App Password instead. (2) The SMTP or IMAP server hostname is incorrect. (3) The port number or encryption type is wrong. Double-check all settings against the reference table in this guide.
What is an App Password and when do I need one?
An App Password is a special 16-character password generated by your email provider specifically for use in third-party apps that do not support two-factor authentication (2FA) login flows. Google Workspace, Microsoft 365, Fastmail, and Zoho all require App Passwords if you have 2FA enabled. Generate them in your account security settings — never share them as they bypass your 2FA.
What DNS records do I need to set up for my custom domain email?
You need at minimum four DNS records: (1) MX record — directs inbound email to your mail provider. (2) SPF TXT record — authorises your mail server to send on your domain’s behalf. (3) DKIM TXT record — adds a cryptographic signature to outgoing mail. (4) DMARC TXT record — enforces authentication policies and sends reports. Without these, your emails are significantly more likely to be marked as spam.
Can I use the same email settings on all my devices?
Yes — IMAP server addresses, ports, and SSL settings are the same regardless of which device or app you use. The credentials (username and password / App Password) are also the same. The only difference is how each operating system or app presents the setup interface, which is why this guide provides device-specific step-by-step instructions for each platform.
Why are my emails going to spam even after setting up IMAP correctly?
IMAP configuration only affects how you receive and access email — it does not affect deliverability. If your emails are going to spam, the issue is almost certainly missing or misconfigured DNS records: SPF, DKIM, or DMARC. Check your DNS records using MXToolbox and verify that all three records are correctly published for your domain. See the DNS Settings section of this guide for the correct values per provider.
What should I do if auto-configuration fails in my email app?
Most email apps attempt to auto-detect IMAP and SMTP settings by querying your domain’s DNS for SRV and autodiscover/autoconfig records. If this fails, select the manual or advanced setup option and enter the settings from the reference table in this guide. The most common fix is switching from auto-detect to manual entry of the exact server hostname and port number.